アバターマスクを使って歩くアニメーションの上から別のアニメーションを上書きしてみます。
歩くアニメーションの他に、腕をパタパタと羽ばたくアニメーションを作りました。
歩くアニメーションをBase Layerに設定し、二番目のレイヤーにこのアニメーションを設定しました。二番目のレイヤーのWeightを上げると、全身のアニメーションが上書きされて、歩くのをやめます。
アバターマスクを設定する
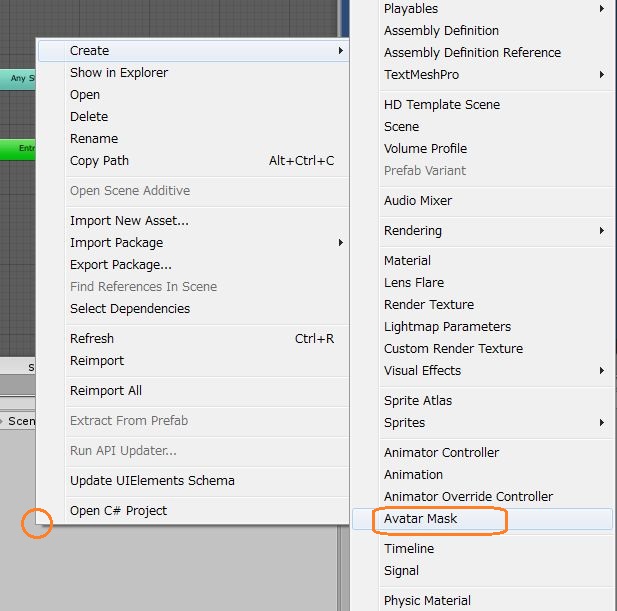
そこで、二番目のアニメーションを腕だけに適用されるようにします。まず、プロジェクトウィンドウでアバターマスクを新規作成して名前を付けます。
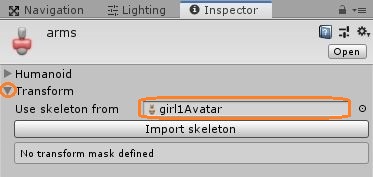
このアバターマスクを選択して、インスペクタでTransformのUse skeleton fromにアバターをドラッグアンドドロップします。インポート設定でAnimation TypeをHumanoidでなくGeneric等にした場合はこのTransformを使います。
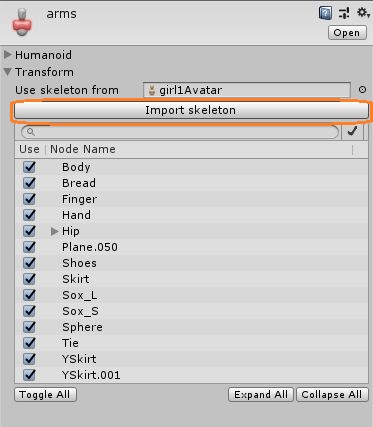
Import skeletonを押すとモデルの階層が表示されるので、アニメーションを適用したい部分にチェックを入れます。
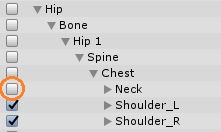
まず不要な部分のチェックを外したいですが、親のチェックを外しても、その下のチェックは入ったままなので注意が必要です。

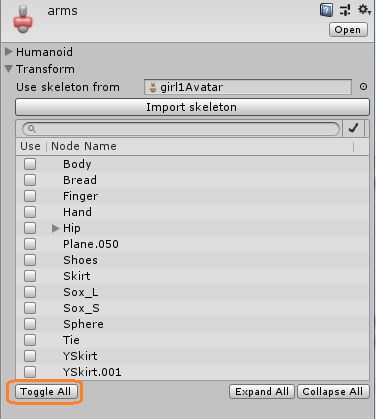
なので、まずはToggle Allボタンを使って全てのチェックを外したほうが良いと思います。
その後、アニメーションを適用したい部分のチェックを入れていきます。各部の名前の横の三角形をクリックすると一つ下の階層が表示されますが、Altキーを押しながらクリックすると、その下の階層が全て開くので便利です。
また、Altキーを押しながらチェックを入れると、それ以降の階層の全てにチェックが入ります。
アバターマスクの設定が終わったら、アニメーターコントローラーの二番目のレイヤーの歯車マークをクリックして、Maskにこのアバターマスクをドラッグアンドドロップします。
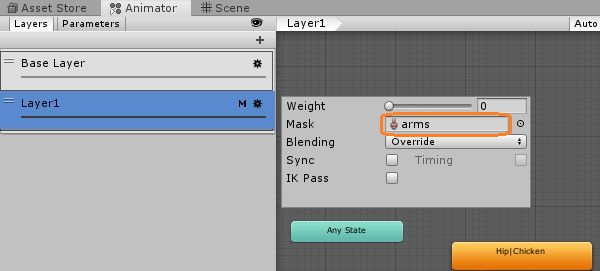
すると、二番目のレイヤーに設定したアニメーションが、腕だけに適用されるようになりました。
ウェイトをスクリプトで変更する
アニメーターのSetLayerWeightメソッドを使うと、Weightを変更できます。
using System.Collections;
using System.Collections.Generic;
using UnityEngine;

public class AvatarMaskTest : MonoBehaviour
{
    Animator animator;

    // Start is called before the first frame update
    void Start()
    {
        animator = GetComponent();
    }

    // Update is called once per frame
    void Update()
    {
        if (Input.GetMouseButtonDown(0))
        {
            animator.SetLayerWeight(1, animator.GetLayerWeight(1) == 0f ? 1f : 0f);
        }
    }
}
第一引数でレイヤーを指定します。Base Layerは0で、二番目のレイヤーは1です。
レイヤーのウェイトをスクリプトで変更できるようになりました。
