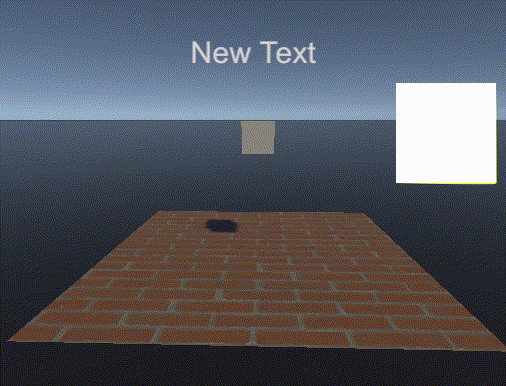
Cubeが衝突した地点のPlaneオブジェクトのUV座標を使って、テクスチャの色を取得してみます。
using System.Collections;
using System.Collections.Generic;
using UnityEngine;
using UnityEngine.UI;
public class GetUVScript : MonoBehaviour
{
[SerializeField] Text text;
[SerializeField] Image image;
Texture2D tex;
MeshRenderer meshRenderer;
// Start is called before the first frame update
void Start()
{
meshRenderer = GetComponent();
}
// Update is called once per frame
void Update()
{
}
private void OnCollisionEnter(Collision collision)
{
if (collision.collider.tag == "Item")
{
Vector3 pos = collision.transform.position;
RaycastHit hit;
tex = meshRenderer.material.mainTexture as Texture2D;
// Cubeの中心から衝突した地点へ向かってレイを飛ばす
if (Physics.Raycast(pos, collision.contacts[0].point - pos, out hit, Mathf.Infinity))
{
Vector2 uv = hit.textureCoord;
Color[] pix = tex.GetPixels(Mathf.FloorToInt(uv.x * tex.width), Mathf.FloorToInt(uv.y * tex.height), 1, 1);
text.text = pix[0].ToString();
image.color = pix[0];
}
}
}
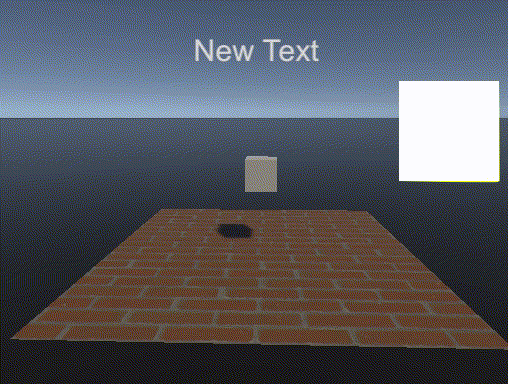
} Planeに上のスクリプトをつけました。タグを付けたCubeが衝突した時に、Cubeの中心から衝突した地点へレイを飛ばして、レイがぶつかった地点のUV座標をhit.textureCoordで取得します。
そして、テクスチャ2DのGetPixelsメソッドを使って、この部分の色を取得します。第1、第2引数にスタート地点を入れて、第3、第4引数では、そこから横、縦に何ピクセル分の色を取得するかを指定します。
これで、簡単にオブジェクトの色を取得できました。
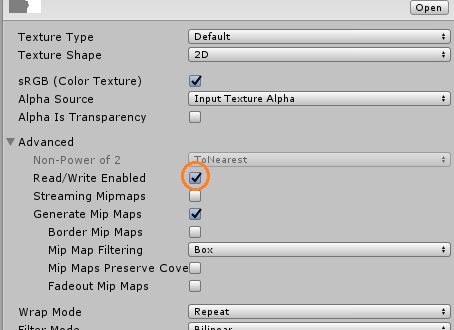
テクスチャはインスペクタでRead/Write Enabledにチェックを入れておきます。
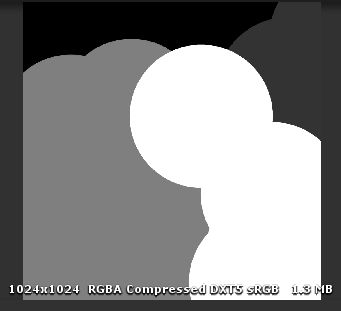
今度はPlaneオブジェクトにつけたテクスチャでなく別のテクスチャを使ってみます。
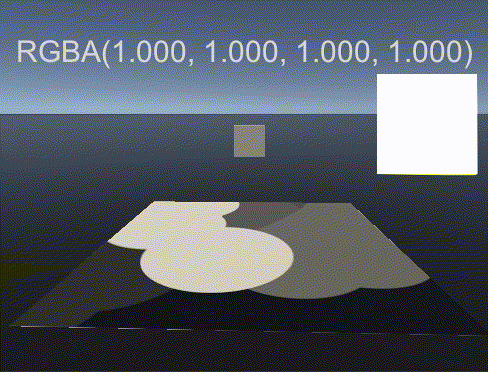
透明な部分のアルファ値もちゃんと取得できています。
このテクスチャはPlaneのメッシュレンダラーからでなく、インスペクタにアタッチしていますが、正常に色が取れています。
