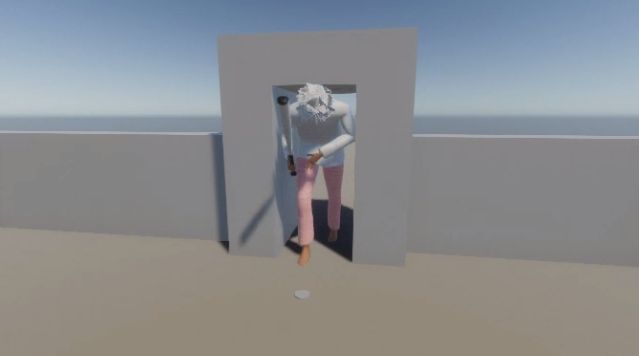
オフメッシュリンク上でのアニメーションや速度を変えるの歩行アニメーションをブレンドツリーで揃えてみました。
ブレンドツリーを作る
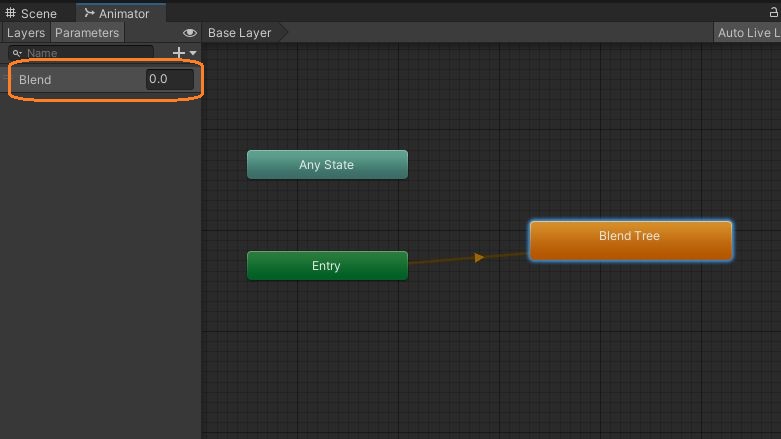
まず、アニメーターコントローラーで新しいブレンドツリーの設定されたステートを作りました。
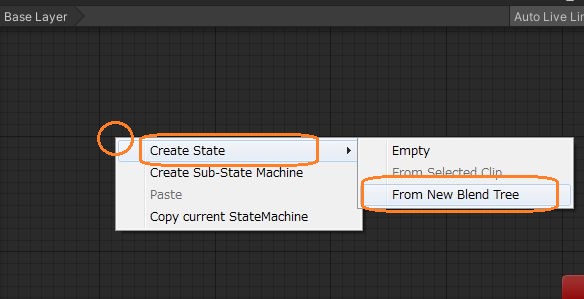
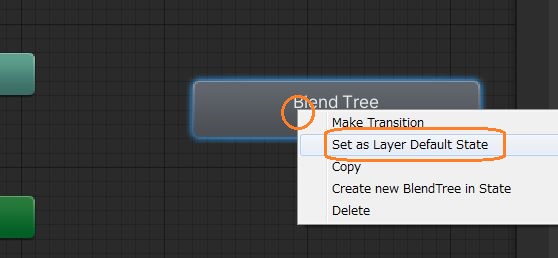
このステートを右クリックして「Set as Layer Default State」を選択して、デフォルトステートにします。
ブレンドツリーでは、+ボタンを2回クリックしてモーションをアタッチする欄を2つ作りました。また、ブレンドツリーを作るとモーションをブレンドするためのFloat型のパラメーターが作られています。
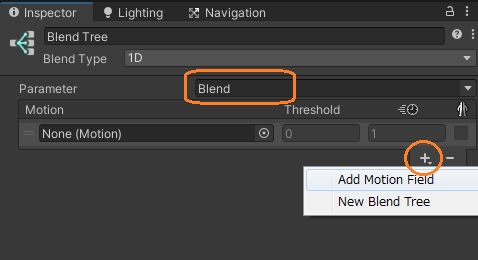
この欄に2種類の歩行モーションをドラッグアンドドロップします。赤いシークバーを動かすと、プレビューでブレンドされる様子が見れます。
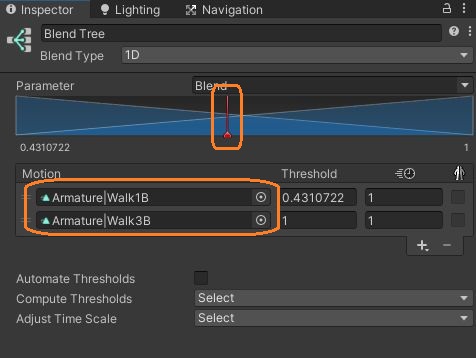
パラメーターの値が0のときは1つ目、1のときは2つ目のアニメーションだけになって、その中間では値に応じてブレンドされます。
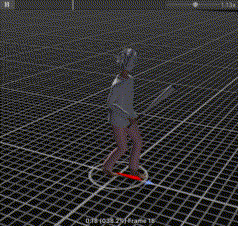
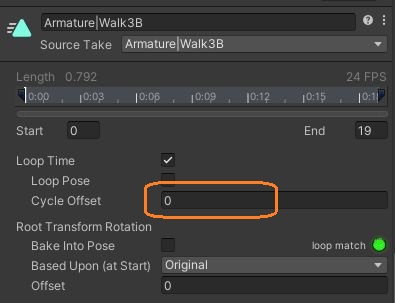
このステートでは2歩分の歩行モーションを繰り返します。足が揃わないときは、インポート設定のAnimationタブの「Cycle Offset」でループの開始位置を補正できます。
スクリプト
スクリプトで、このパラメーターの値をセットします。
using UnityEngine;
using UnityEngine.AI;

[RequireComponent(typeof(NavMeshAgent))]
[RequireComponent(typeof(Animator))]
public class OffMeshLinkTest : MonoBehaviour
{
    NavMeshAgent agent;
    Animator animator;
    bool isPassing;
    bool isBlending;
    [SerializeField] Transform goal;
    float defaultSpeed;
    [SerializeField] float linkSpeed = 0.2f;
    [SerializeField] float blendSpeed = 0.1f;

    // Start is called before the first frame update
    void Start()
    {
        agent = GetComponent<NavMeshAgent>();
        agent.autoTraverseOffMeshLink = true;

        // 目的地を設定
        agent.destination = goal.position;

        // スピードを保存
        defaultSpeed = agent.speed;

        animator = GetComponent<Animator>();
    }

    // Update is called once per frame
    void Update()
    {
        // 通過中
        if(isPassing)
        {
            // オフメッシュリンクから抜けると
            if (!agent.isOnOffMeshLink)
            {
                // スピードを戻す
                agent.speed = defaultSpeed;

                // 通過中を解除
                isPassing = false;

                isBlending = true;
            }
            // オフメッシュリンク上でブレンド中のとき
            else if (isBlending)
            {
                // パラメーターを1に向けて上げる
                animator.SetFloat("Blend", 1f, blendSpeed, Time.deltaTime);

                // 0.9以上のとき
                if (animator.GetFloat("Blend") >= 0.9f)
                {
                    animator.SetFloat("Blend", 1f);

                    // ブレンド中を解除
                    isBlending = false;
                }
            }

        }
        // 通過中でないとき
        else
        {
            // オフメッシュリンク上に来たら
            if(agent.isOnOffMeshLink)
            {
                // スピードを遅くする
                agent.speed = defaultSpeed * linkSpeed;

                // 通過中にする
                isPassing = true;

                // ブレンド中にする
                isBlending = true;
            }
            // オフメッシュリンク上でなくブレンド中のとき
            else if (isBlending)
            {
                // パラメーターの値を0に向かって下げる
                animator.SetFloat("Blend", 0f, blendSpeed, Time.deltaTime);

                // 0.1以下になると
                if (animator.GetFloat("Blend") <= 0.1f)
                {
                    animator.SetFloat("Blend", 0f);
                    // ブレンド中を解除
                    isBlending = false;
                }
            }

        }
    }

}
値の設定にはAnimator.SetFloatメソッドを使います。第一引数でパラメーターを指定して、第二引数に目的の値を渡します。引数が4つのオーバーロードでは、第三引数に渡す値によって、目的の値になるまでにかかる時間を調整できます。
// パラメーターを1に向けて上げる
animator.SetFloat("Blend", 1f, blendSpeed, Time.deltaTime);

// 0.9以上のとき
if (animator.GetFloat("Blend") >= 0.9f)
{
    animator.SetFloat("Blend", 1f);

    // ブレンド中を解除
    isBlending = false;
}
これで、歩行の周期が揃いました。

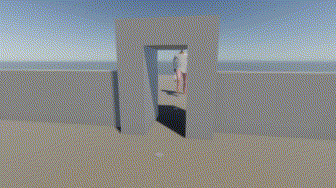
目的の値の付近で変化が鈍くなって到達しきらないので、その手前で目的の値に切り替えています。