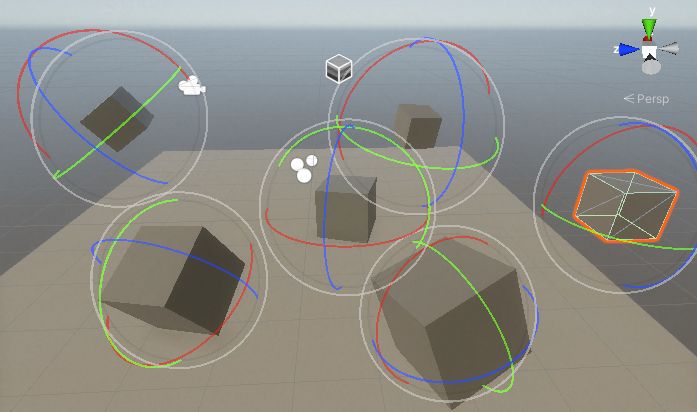
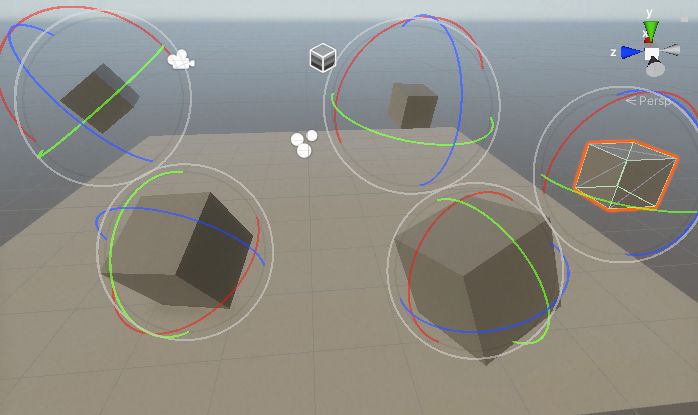
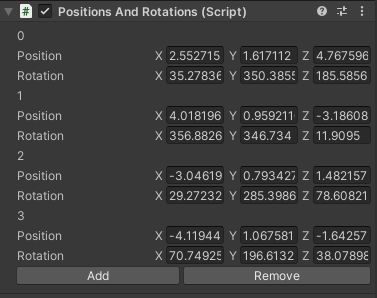
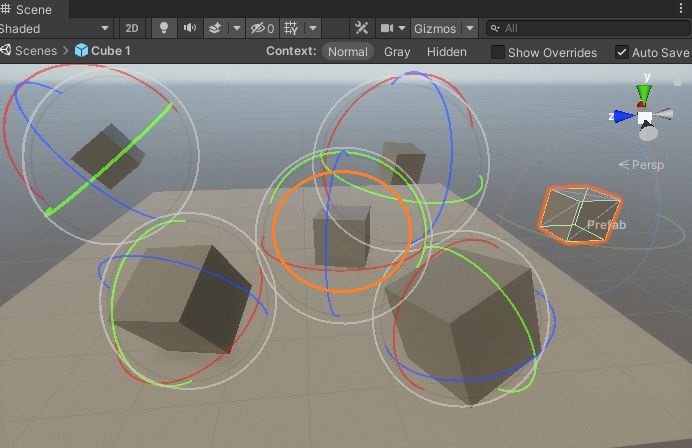
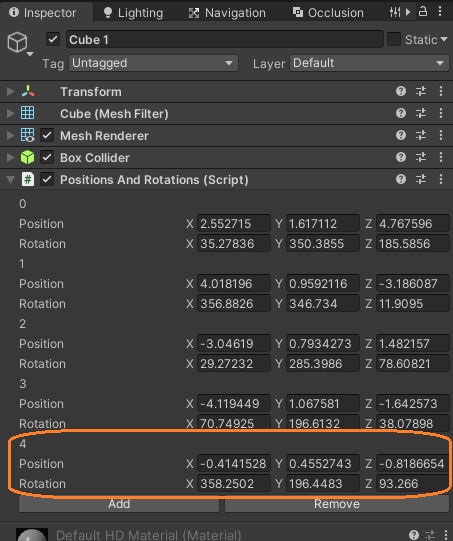
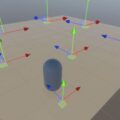
カスタムエディタを使って、シーンビューに複数のメッシュを表示し、それらのメッシュの位置と回転の値をリストに入れてみました。
スクリプトをつける
まず、Cubeオブジェクトにスクリプトを付けました。このスクリプトでは、個々の位置と回転を持つクラスを作り、MonoBehaviourを継承したクラスでは、そのクラスのリストを持ちます。
using System.Collections.Generic;
using UnityEngine;

[System.Serializable]
public class PositionAndRotation
{
    public Vector3 position;
    public Quaternion rotation = Quaternion.identity;
}

public class PositionsAndRotations : MonoBehaviour
{
    public List<PositionAndRotation> instantiationInfo = new List<PositionAndRotation>();

    // Start is called before the first frame update
    void Start()
    {

    }

}
回転値が(0, 0, 0, 0)だと、カスタムエディタでメッシュを描画するときにエラーになるようです。
なので、回転をQuaternion.identityで初期化しています。また、位置と回転のリストも初期化して、カスタムエディタで要素数をみるときにエラーが出ないようにしています。
カスタムエディタを作る
次にこのスクリプトコンポーネントのためのカスタムエディタを作りました。
using System.Collections.Generic;
using UnityEngine;
using UnityEditor;

[CustomEditor(typeof(PositionsAndRotations))]
public class PositionsAndRotationsEditor : Editor
{
    Mesh mesh;
    Material material;

    Vector3 pos;
    Quaternion rot;

    PositionsAndRotations targetScript;
    List<PositionAndRotation> info;

    void OnEnable()
    {
        // スクリプトを取得
        targetScript = target as PositionsAndRotations;

        // 位置と回転のリストを取得
        info = targetScript.instantiationInfo;

        // メッシュ・マテリアルを取得
        mesh = targetScript.GetComponent<MeshFilter>().sharedMesh;
        material = targetScript.GetComponent<MeshRenderer>().sharedMaterial;
    }

    // インスペクタ
    public override void OnInspectorGUI()
    {
        // リストを一巡
        for(int i = 0; i < info.Count; i++)
        {
            // 要素のインデックス
            EditorGUILayout.LabelField(i + "");

            // 位置のフィールド
            EditorGUILayout.Vector3Field("Position",info[i].position);

            // 回転のフィールド
            EditorGUILayout.Vector3Field("Rotation",info[i].rotation.eulerAngles);
        }

        // EndHorizontal()までのボタンを横に並べる
        EditorGUILayout.BeginHorizontal();

        // Addボタンを表示
        if(GUILayout.Button("Add"))
        {
            // Addボタンが押されたときの処理

            // リストに新しい要素を追加
            info.Add(new PositionAndRotation());
        }
        // 要素数が0でないとき、Removeボタンを表示
        if (info.Count > 0 && GUILayout.Button("Remove"))
        {
            // Removeボタンが押されたときの処理

            // 最後の要素を削除
            info.RemoveAt(info.Count - 1);
        }

        EditorGUILayout.EndHorizontal();
    }

    // シーンビュー
    public void OnSceneGUI()
    {
        // リストを一巡
        for (int i = 0; i < info.Count; i++)
        {
            // GUI要素を囲う
            EditorGUI.BeginChangeCheck();

            // 移動ツールのとき
            if (Tools.current == Tool.Move)
            {
                // ハンドルで位置を取得
                pos = Handles.PositionHandle(info[i].position, info[i].rotation);
                rot = info[i].rotation;
            }
            // 回転ツールのとき
            else if (Tools.current == Tool.Rotate)
            {
                // ハンドルで回転を取得
                rot = Handles.RotationHandle(info[i].rotation, info[i].position);
                pos = info[i].position;
            }

            // 囲われたGUI要素に変更があれば
            if (EditorGUI.EndChangeCheck())
            {
                // 以降の変更点を記録してアンドゥできるようにする
                Undo.RecordObject(target, "Move point");

                // 位置と回転を設定
                info[i].position = pos;
                info[i].rotation = rot;

            }

            // メッシュを描画
            Graphics.DrawMesh(mesh, pos, rot, material, 0);
        }


    }
}
このクラスには、CustomEditor属性を付けて、Editorクラスを継承させます。
[CustomEditor(typeof(PositionsAndRotations))]
public class PositionsAndRotationsEditor : Editor
オブジェクトがロードされると、ターゲットのスクリプトが持つ位置と回転のリストやメッシュ、マテリアルを取得します。
Mesh mesh;
Material material;

Vector3 pos;
Quaternion rot;

PositionsAndRotations targetScript;
List<PositionAndRotation> info;

void OnEnable()
{
    // スクリプトを取得
    targetScript = target as PositionsAndRotations;

    // 位置と回転のリストを取得
    info = targetScript.instantiationInfo;

    // メッシュ・マテリアルを取得
    mesh = targetScript.GetComponent<MeshFilter>().sharedMesh;
    material = targetScript.GetComponent<MeshRenderer>().sharedMaterial;
}
今回は、SerializedObjectやSerializedPropertyを使うとエラーになるようなので、ターゲットのスクリプトを取得して直接値を変えています。
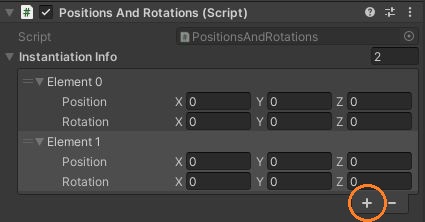
また、インスペクタでリストのデフォルトのレイアウトでは、+ボタンで要素を追加すると、回転値が(0, 0, 0, 0)になってしまうので、インスペクタもカスタマイズしました。
// インスペクタ
public override void OnInspectorGUI()
{
    // リストを一巡
    for(int i = 0; i < info.Count; i++)
    {
        // 要素のインデックス
        EditorGUILayout.LabelField(i + "");

        // 位置のフィールド
        EditorGUILayout.Vector3Field("Position",info[i].position);

        // 回転のフィールド
        EditorGUILayout.Vector3Field("Rotation",info[i].rotation.eulerAngles);
    }

    // EndHorizontal()までのボタンを横に並べる
    EditorGUILayout.BeginHorizontal();

    // Addボタンを表示
    if(GUILayout.Button("Add"))
    {
        // Addボタンが押されたときの処理

        // リストに新しい要素を追加
        info.Add(new PositionAndRotation());
    }
    // 要素数が0でないとき、Removeボタンを表示
    if (info.Count > 0 && GUILayout.Button("Remove"))
    {
        // Removeボタンが押されたときの処理

        // 最後の要素を削除
        info.RemoveAt(info.Count - 1);
    }

    EditorGUILayout.EndHorizontal();
}
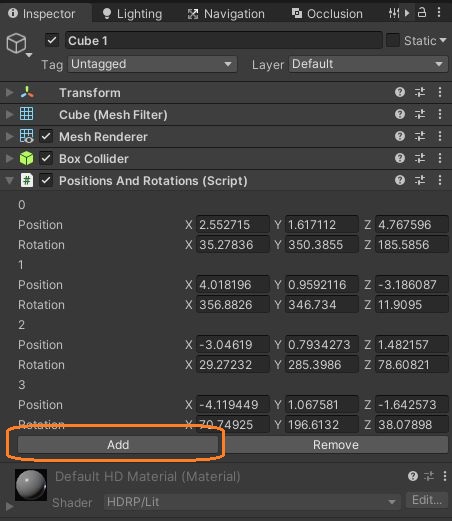
ここでは、まずリストの要素数の数だけそのインデックスと位置、回転を表示しています。その後、リストに要素を追加・削除するボタンを表示しています。
そして、追加ボタンを押したときに位置と回転を持つクラスをnewキーワードでインスタンス化してリストに追加すると、初期化したとおりに値が(0, 0, 0, 1)になりました。
// Addボタンを表示
if(GUILayout.Button("Add"))
{
    // Addボタンが押されたときの処理

    // リストに新しい要素を追加
    info.Add(new PositionAndRotation());
}
削除ボタンはリストの要素数が0でないときだけ表示します。
// 要素数が0でないとき、Removeボタンを表示
if (info.Count > 0 && GUILayout.Button("Remove"))
{
    // Removeボタンが押されたときの処理

    // 最後の要素を削除
    info.RemoveAt(info.Count - 1);
}シーンビューでもリストの要素を1つずつ見ていきます。
// シーンビュー
public void OnSceneGUI()
{
    // リストを一巡
    for (int i = 0; i < info.Count; i++)
    {
        // GUI要素を囲う
        EditorGUI.BeginChangeCheck();

        // 移動ツールのとき
        if (Tools.current == Tool.Move)
        {
            // ハンドルで位置を取得
            pos = Handles.PositionHandle(info[i].position, info[i].rotation);
            rot = info[i].rotation;
        }
        // 回転ツールのとき
        else if (Tools.current == Tool.Rotate)
        {
            // ハンドルで回転を取得
            rot = Handles.RotationHandle(info[i].rotation, info[i].position);
            pos = info[i].position;
        }

        // 囲われたGUI要素に変更があれば
        if (EditorGUI.EndChangeCheck())
        {
            // 以降の変更点を記録してアンドゥできるようにする
            Undo.RecordObject(target, "Move point");

            // 位置と回転を設定
            info[i].position = pos;
            info[i].rotation = rot;

        }

        // メッシュを描画
        Graphics.DrawMesh(mesh, pos, rot, material, 0);
    }


}
Tools.currentを使って、現在選択中のツールによって場合分けしています。移動ツールを使っているときはハンドルで位置だけを変更し、回転ツールでは回転だけを変更します。
// GUI要素を囲う
EditorGUI.BeginChangeCheck();

// 移動ツールのとき
if (Tools.current == Tool.Move)
{
    // ハンドルで位置を取得
    pos = Handles.PositionHandle(info[i].position, info[i].rotation);
    rot = info[i].rotation;
}
// 回転ツールのとき
else if (Tools.current == Tool.Rotate)
{
    // ハンドルで回転を取得
    rot = Handles.RotationHandle(info[i].rotation, info[i].position);
    pos = info[i].position;
}
ハンドルの変更を知るために、これらをEditorGUI.BeginChangeCheckメソッドとEditorGUI.EndChangeCheckメソッドで囲います。変更があればEditorGUI.EndChangeCheckがtrueになります。その時にはUndo.RecordObjectメソッドの後に、リストの要素に位置と回転を設定します。
// 囲われたGUI要素に変更があれば
if (EditorGUI.EndChangeCheck())
{
    // 以降の変更点を記録してアンドゥできるようにする
    Undo.RecordObject(target, "Move point");

    // 位置と回転を設定
    info[i].position = pos;
    info[i].rotation = rot;

}
Undo.RecordObjectの後にリストの値を変更しないと、変更点が記録されず、Ctrl + Zで元に戻せなくなるので、Handles.PositionHandleメソッドなどの戻り値は一旦別の変数に入れて、リストにはここで設定しています。
その後、メッシュを描画します。
// メッシュを描画
Graphics.DrawMesh(mesh, pos, rot, material, 0);
ハンドルで値を設定する
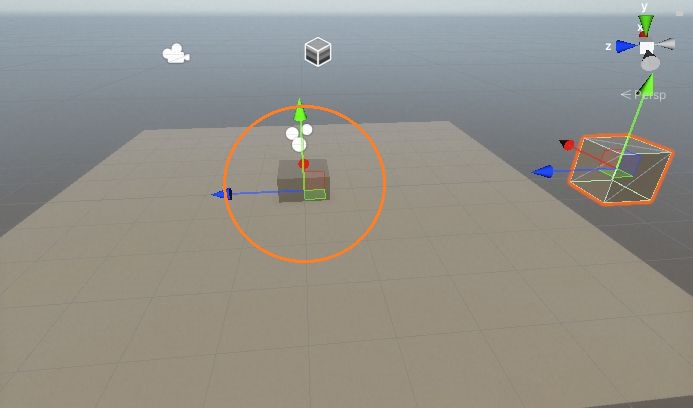
インスペクタでAddボタンを押すと、シーンビューでワールド空間の原点にこのスクリプトを追加したCubeと同じメッシュとマテリアルのCubeが描画されます。
ハンドルを使って位置と回転を変えると、インスペクタの値も変わります。
Addボタンでさらにメッシュを増やして、別々の位置と回転の値を設定できます。
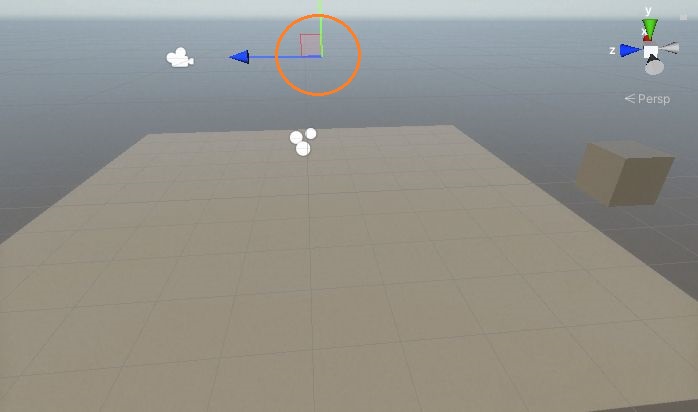
別のオブジェクトを選択していると、これらのメッシュは描画されません。
プレハブ化して値を変える
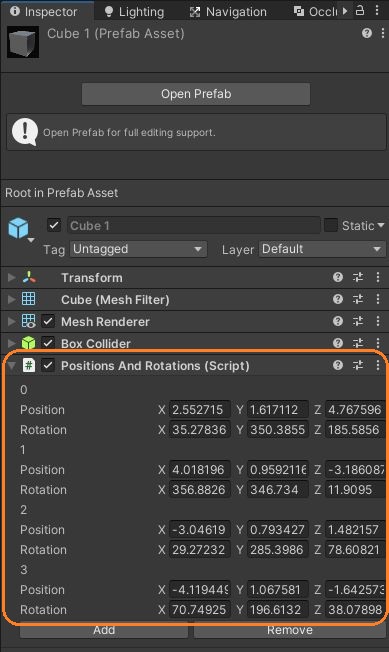
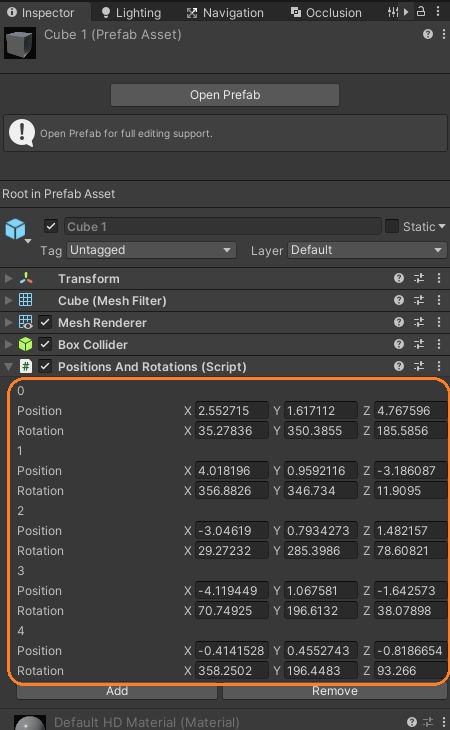
これらの値を、インスタンス化するときに使ってみます。まず、このCubeをプレハブ化しました。Projectウィンドウにあるプレハブアセットはシーンビューで設定した値を持っています。
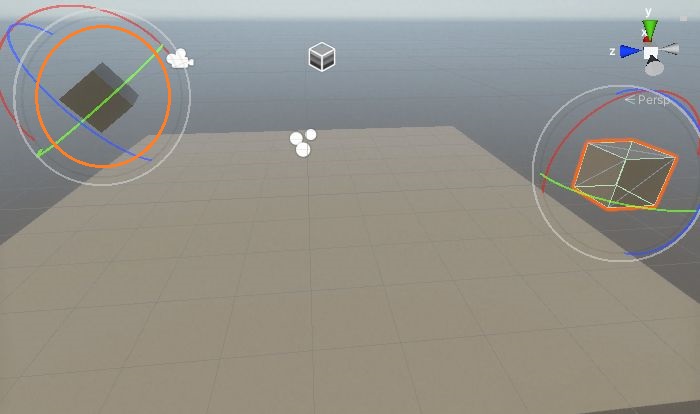
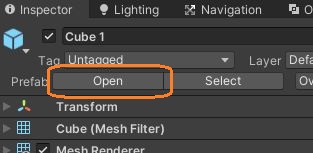
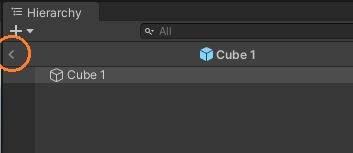
プレハブの値をハンドルで変えたいときは、プレハブをシーンビューやヒエラルキーウィンドウにドラッグアンドドロップしてインスタンス化し、ヒエラルキーのこのインスタンスの右にある矢印を選択するか、インスタンスを選択してインスペクタの「Open」ボタンをクリックします。
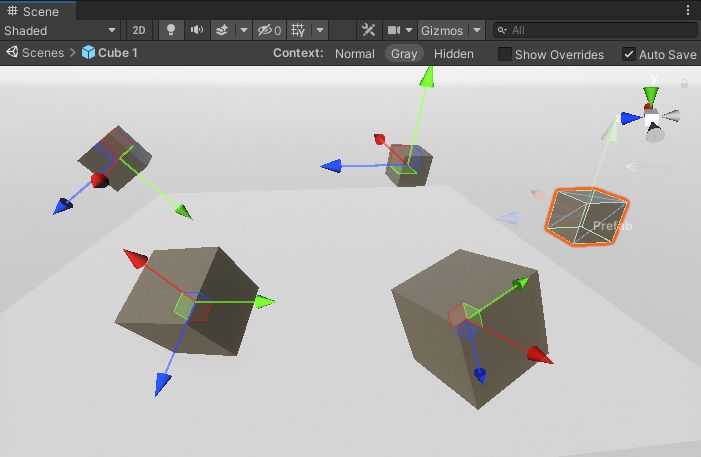
すると、シーンビューでインスタンスの周りの環境がうっすらと見えた状態のプレハブモードでプレハブアセットを開けます。
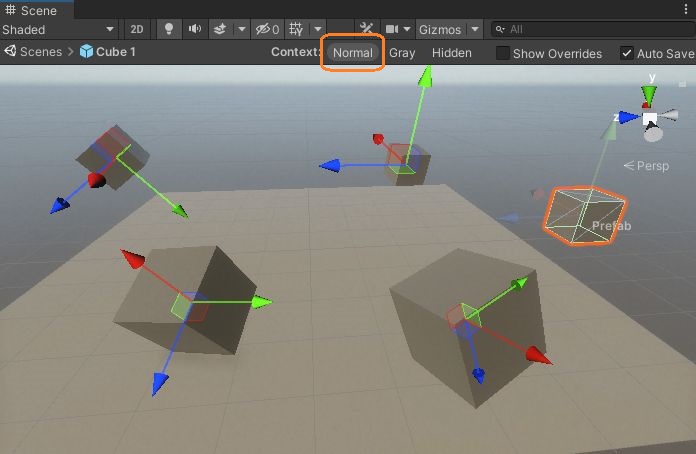
プレハブバーで「Normal」を選択すると、これらの環境が通常の色で表示されます。
この状態でインスペクタの「Add」ボタンを押して要素を追加し、ハンドルで値を変更できます。
プレハブモードを終了するには、ヒエラルキーウィンドウの左矢印を選択します。
これでプレハブアセットの値を変えられました。
設定した位置・回転にインスタンス化する
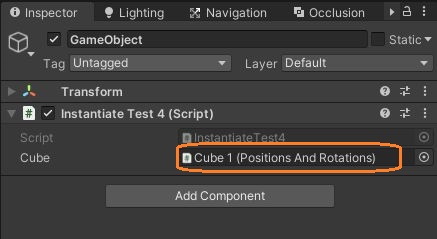
このプレハブをインスタンス化するために、空のゲームオブジェクトにスクリプトを付けて、プレハブをアタッチしました。
スクリプトでは、Instantiateメソッドの引数に、プレハブのスクリプトが持つリストの値を渡します。
using UnityEngine;

public class InstantiateTest4 : MonoBehaviour
{
    // プレハブ
    [SerializeField] PositionsAndRotations cube;

    // Start is called before the first frame update
    void Start()
    {
        // すべての位置・回転にインスタンスを作る
        for (int i = 0; i < cube.instantiationInfo.Count; i++)
        {
            Instantiate(cube, cube.instantiationInfo[i].position, cube.instantiationInfo[i].rotation);
        }

    }

}
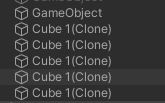
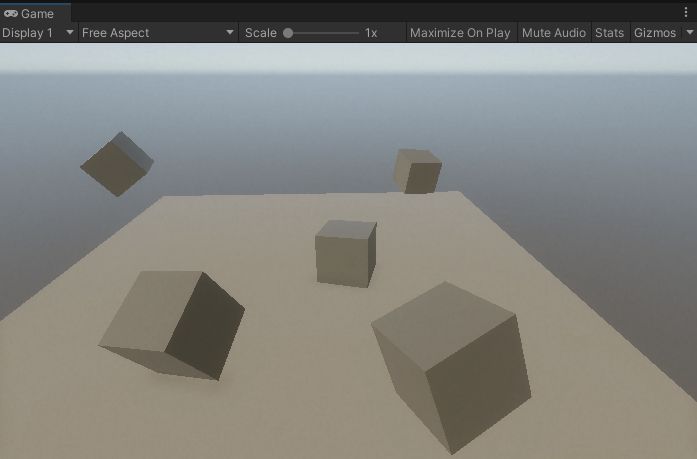
プレイモードにすると、設定した位置・回転でインスタンスが作られました。
